Documentation
Learn how Polypane improves your workflow
Configuring Logitech mouses on macOS
Logitech mouses like the MX master series have dedicated buttons for forward and back. On Windows and Linux these buttons are automatically recognized by Polypane and can be used to navigate through the history but on macOS they need to be configured.
Step 1: install Logi Options+
If you haven't yet, install Logi Options+ from the Logitech website.
Step 2: configuring your mouse
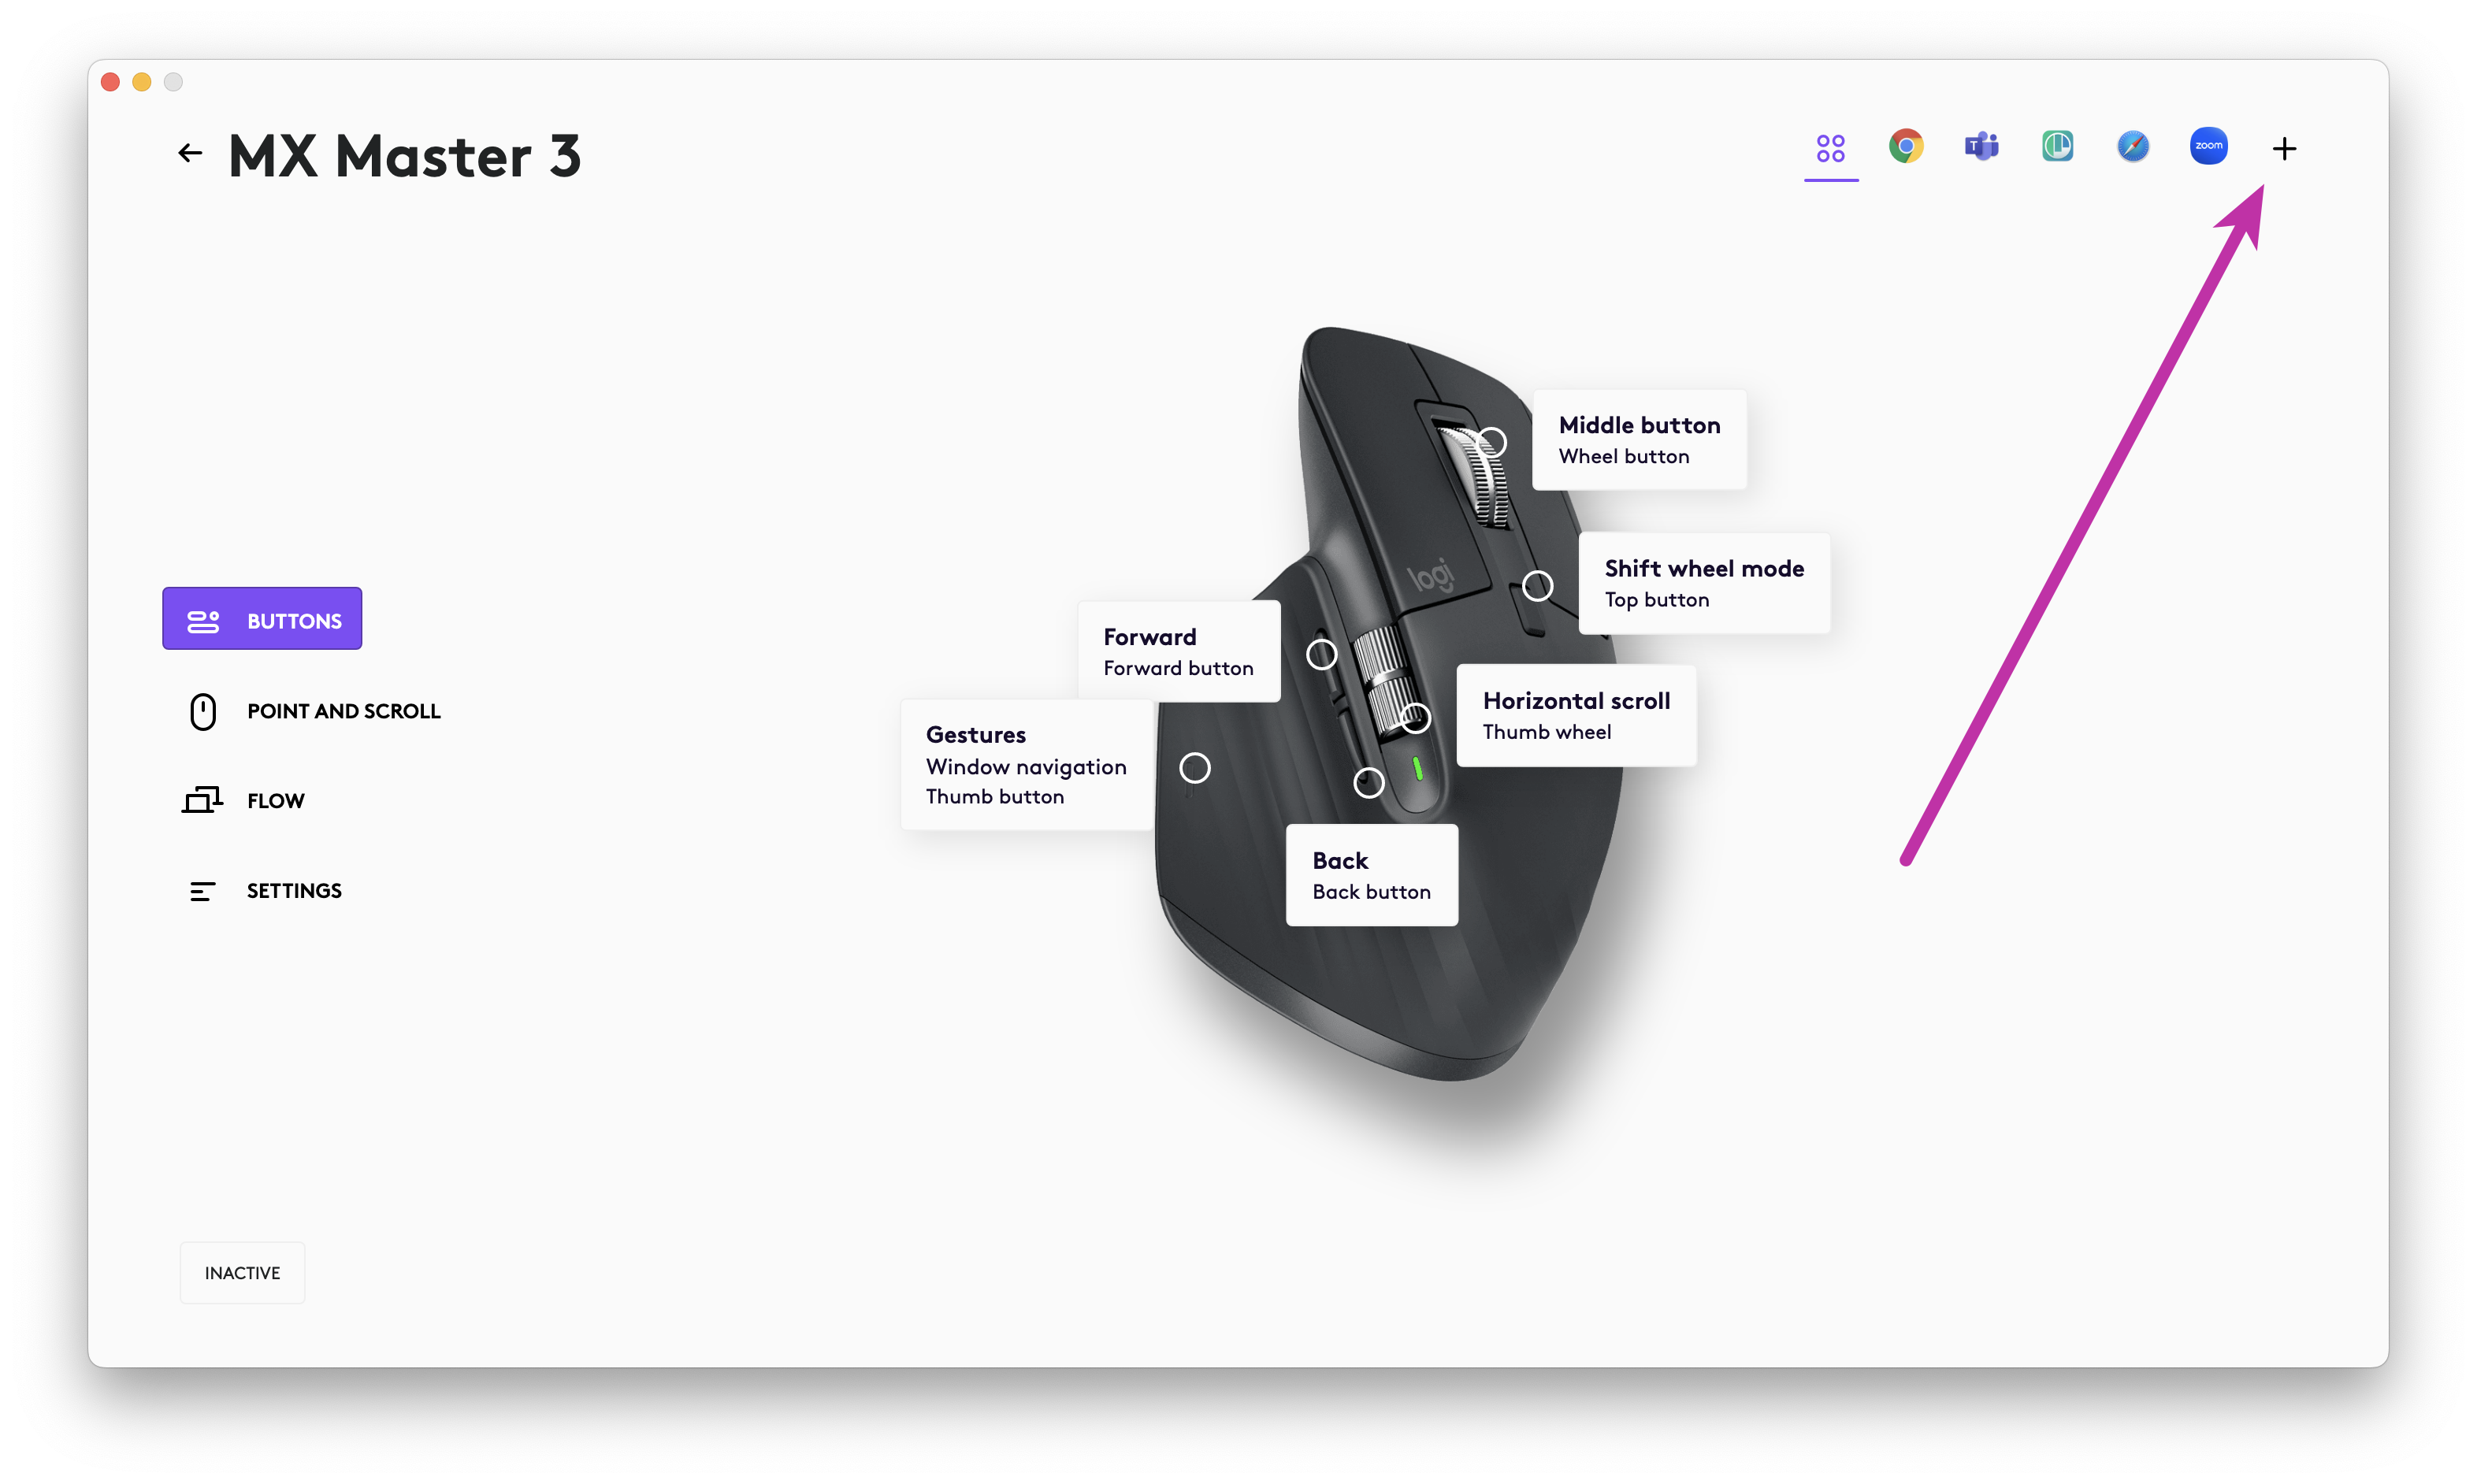
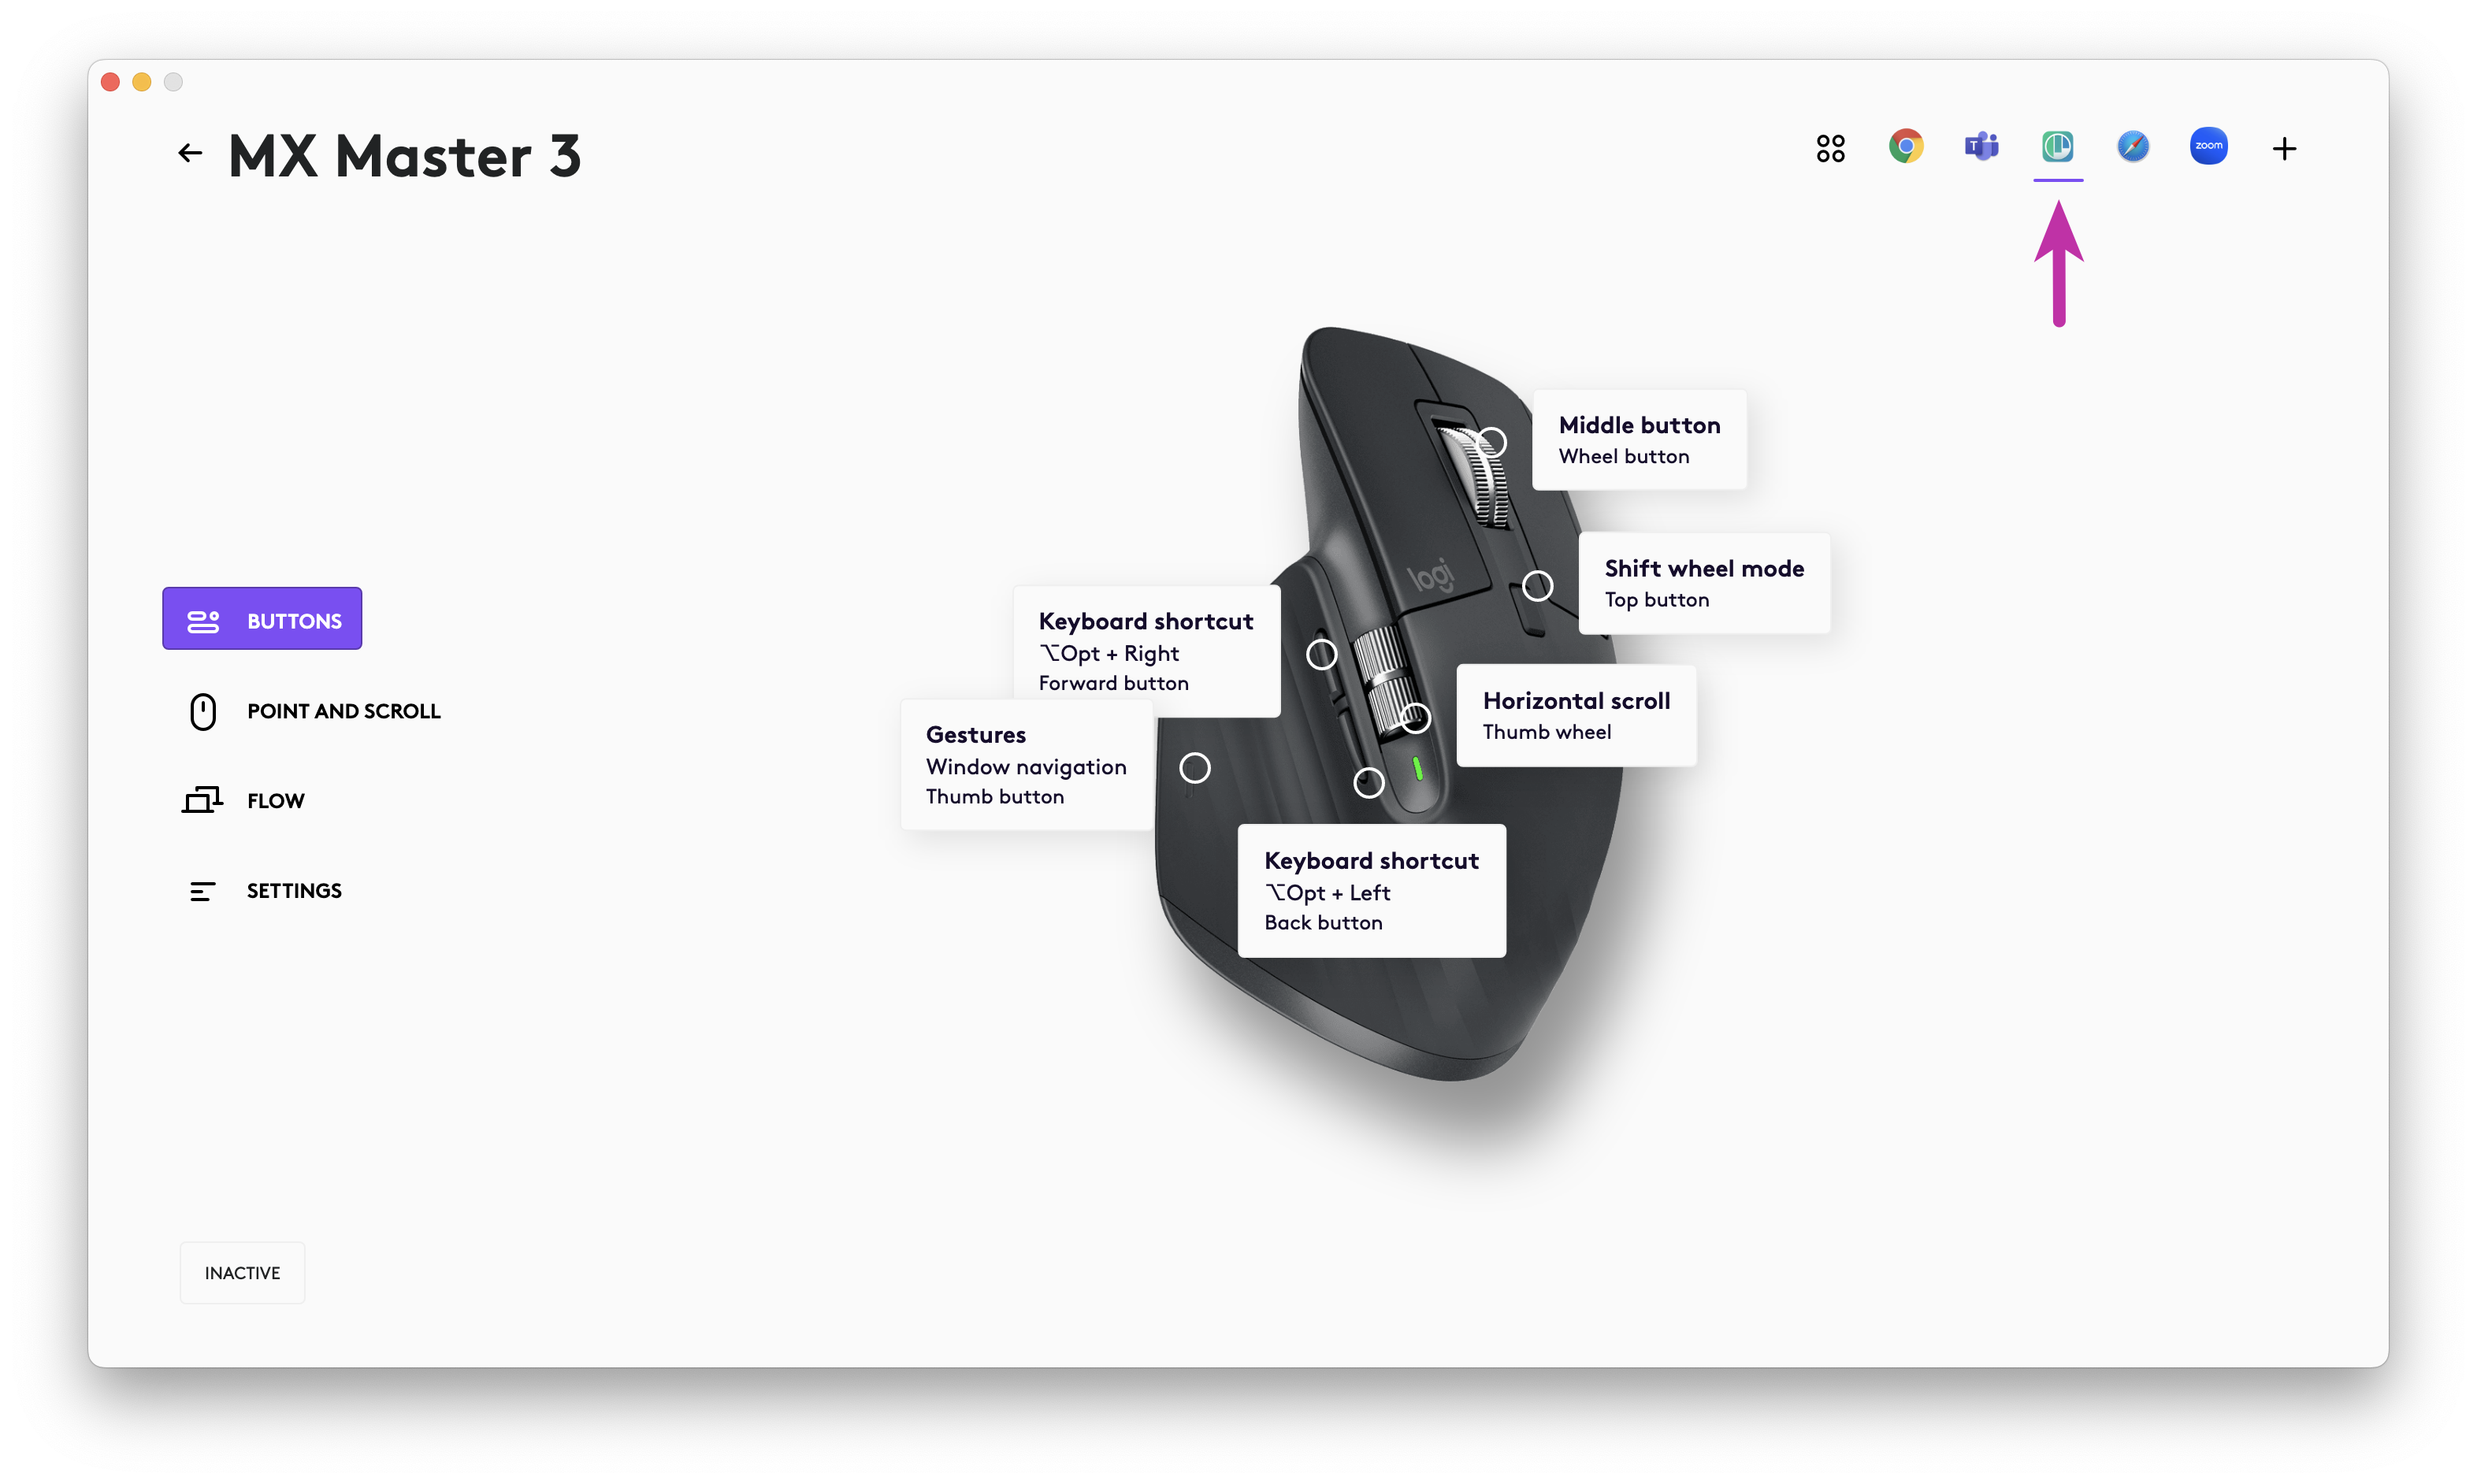
With the Logi Options+ app open, select your mouse, then click the Plus button at the top of the app:
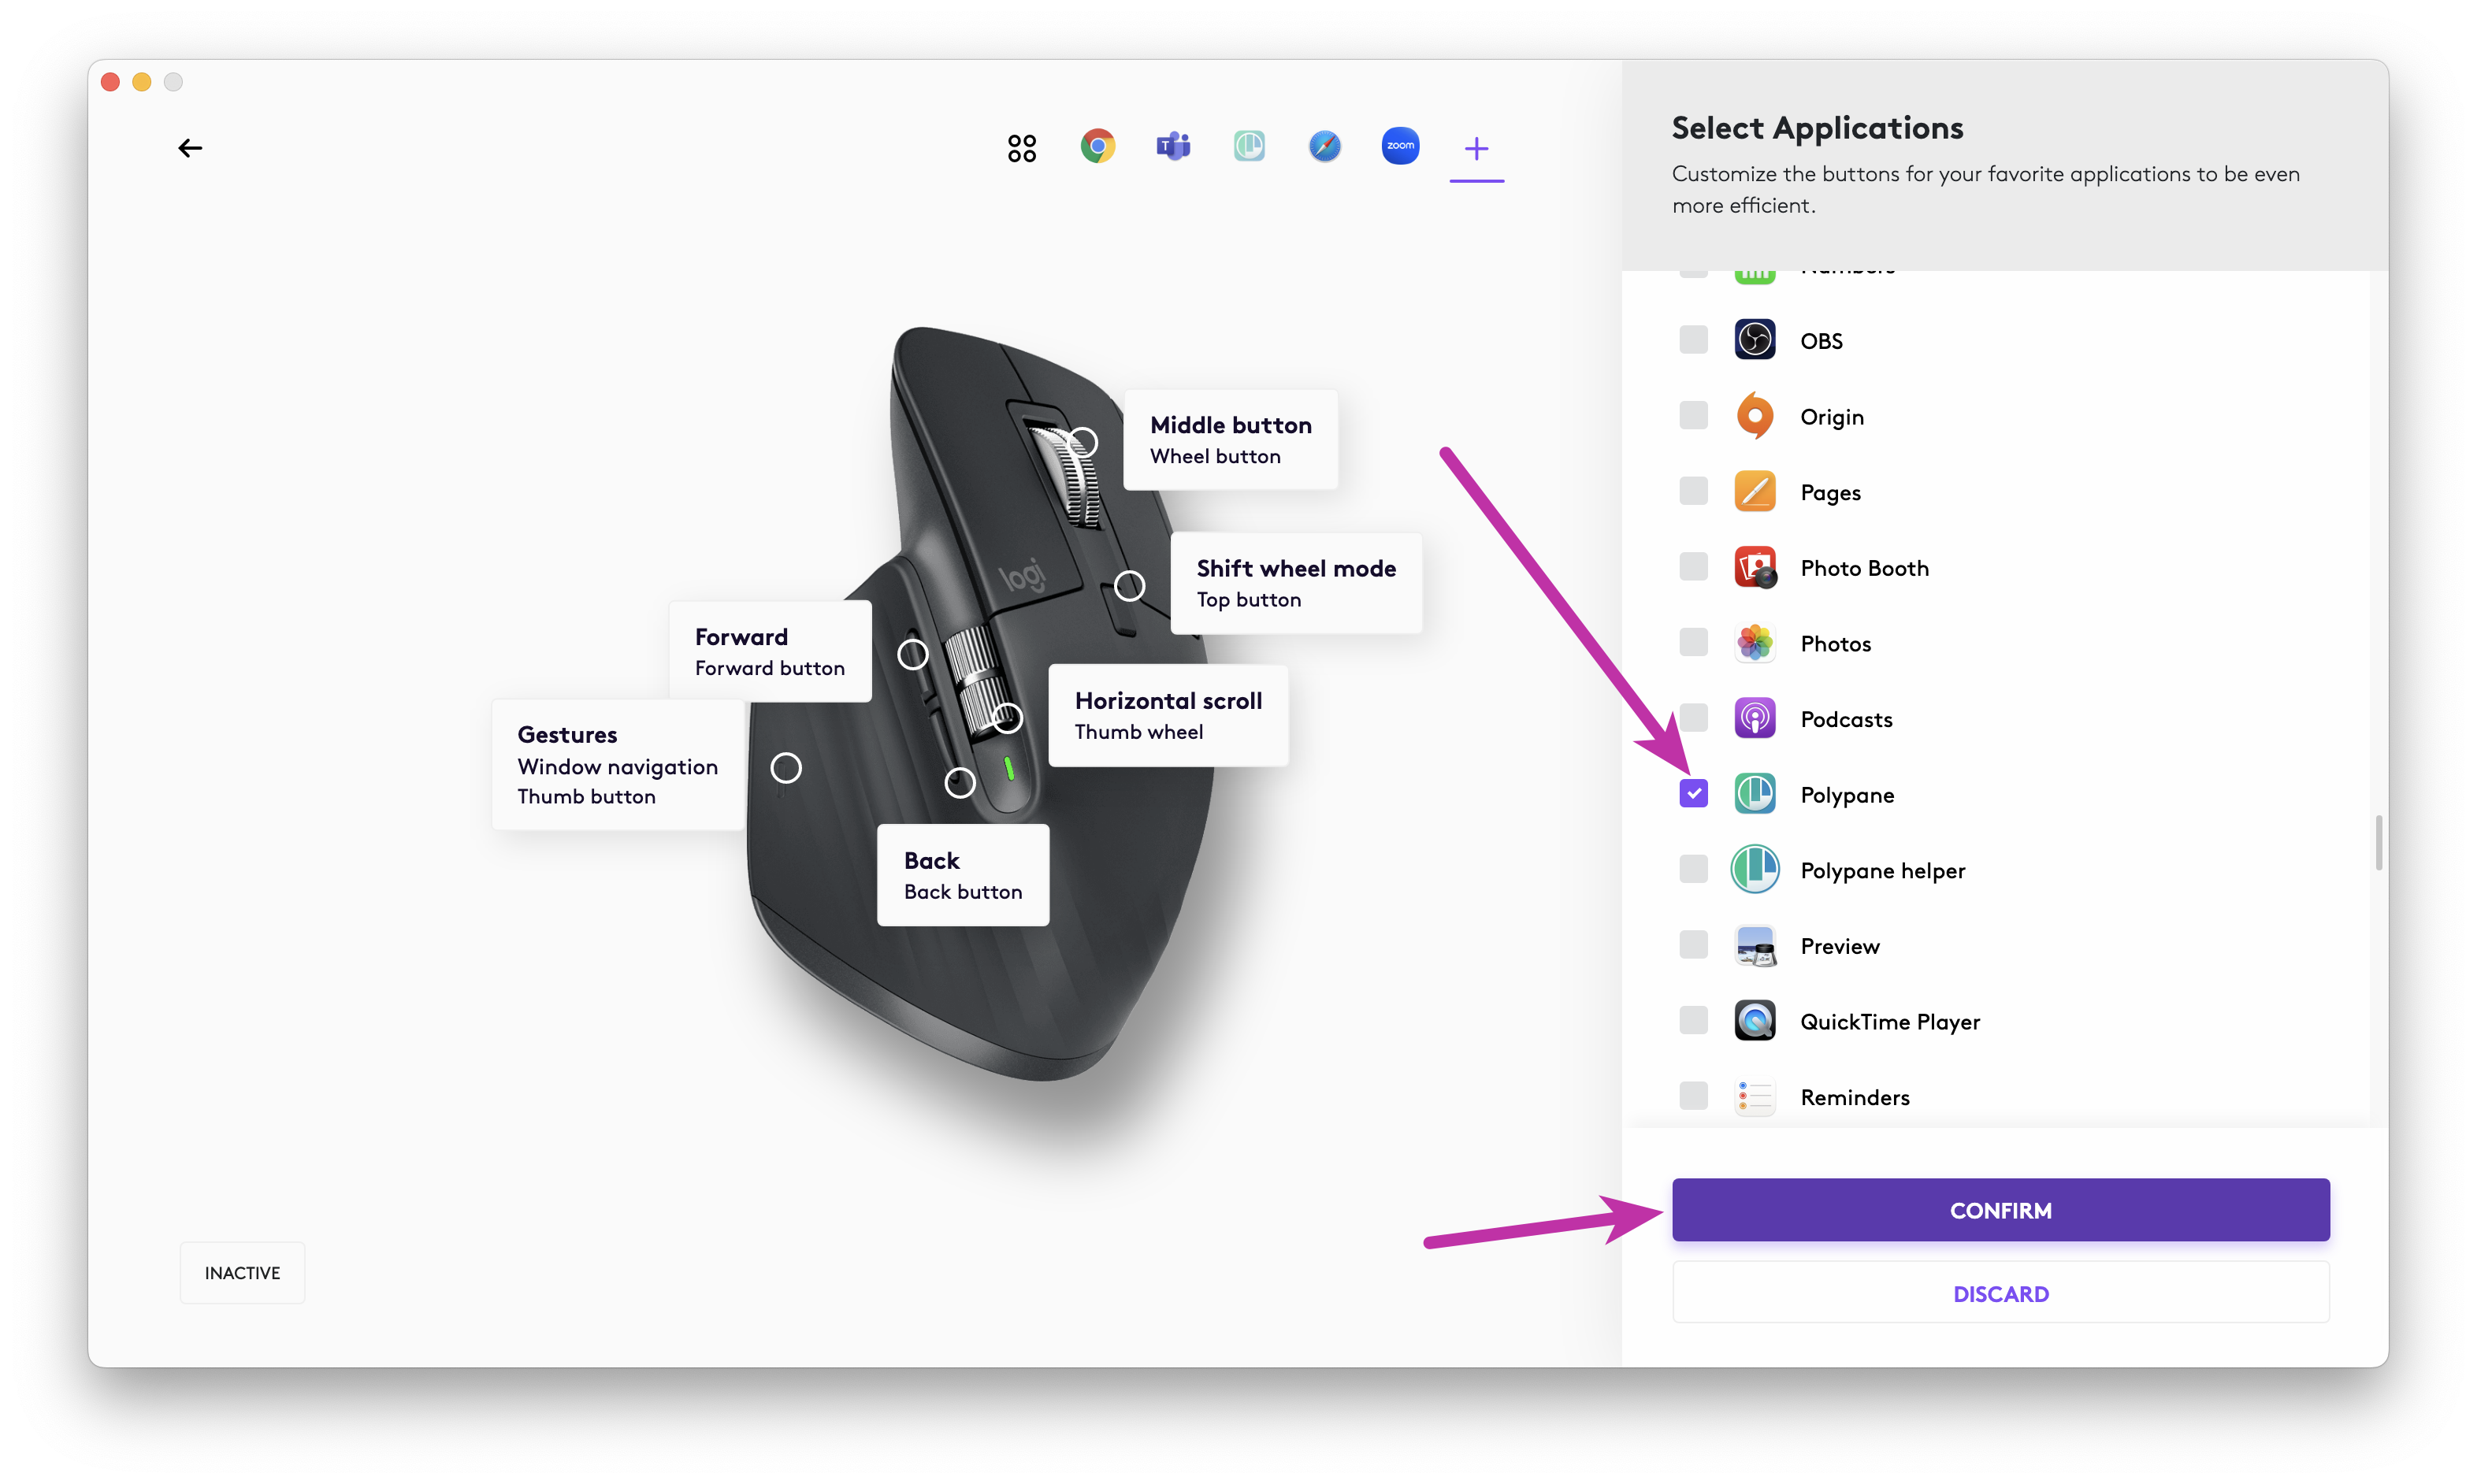
Scroll down the list of apps until you find "Polypane". Check the box next to it and click "Confirm".
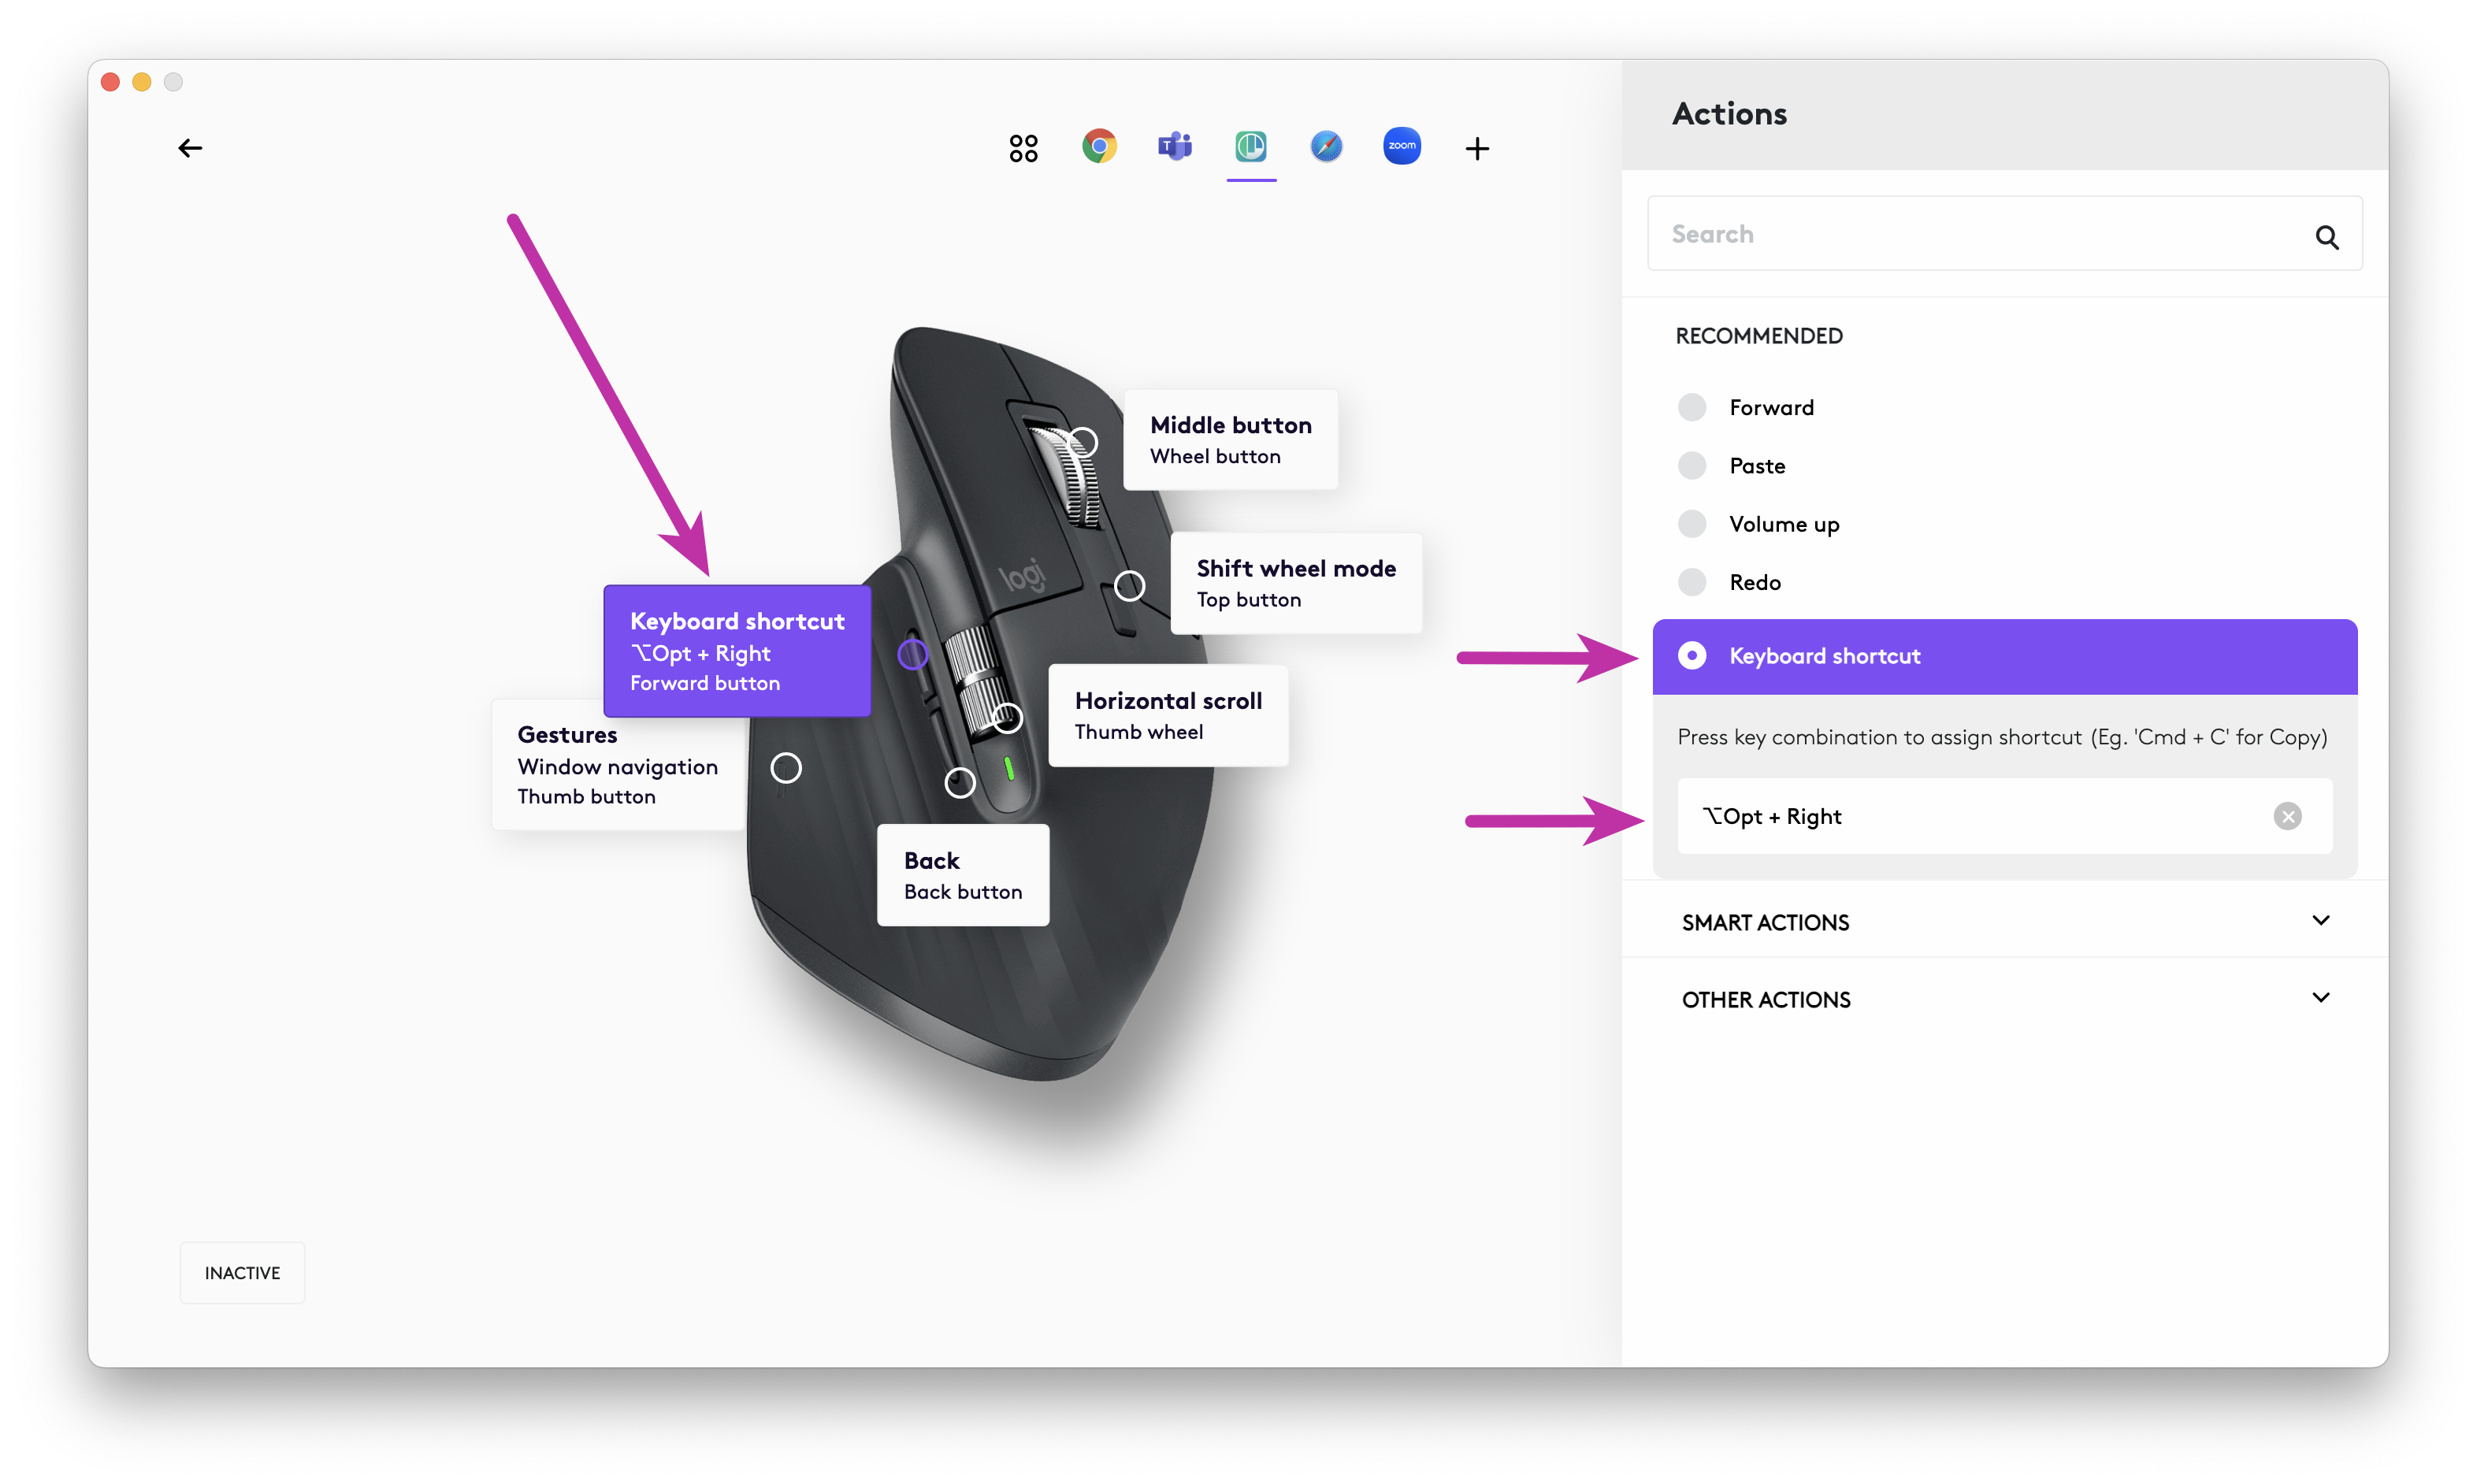
Now you'll see the Polypane icon in the list of icons at the top of the screen and we can configure the buttons. Start by clicking the button that says "Forward". In the sidebar pick "Keyboard shortcut", then click into the shortcut field and press ⌥ Right.
Do the same for the "Back" button, and now set the keyboard shortcut to ⌥ Left.
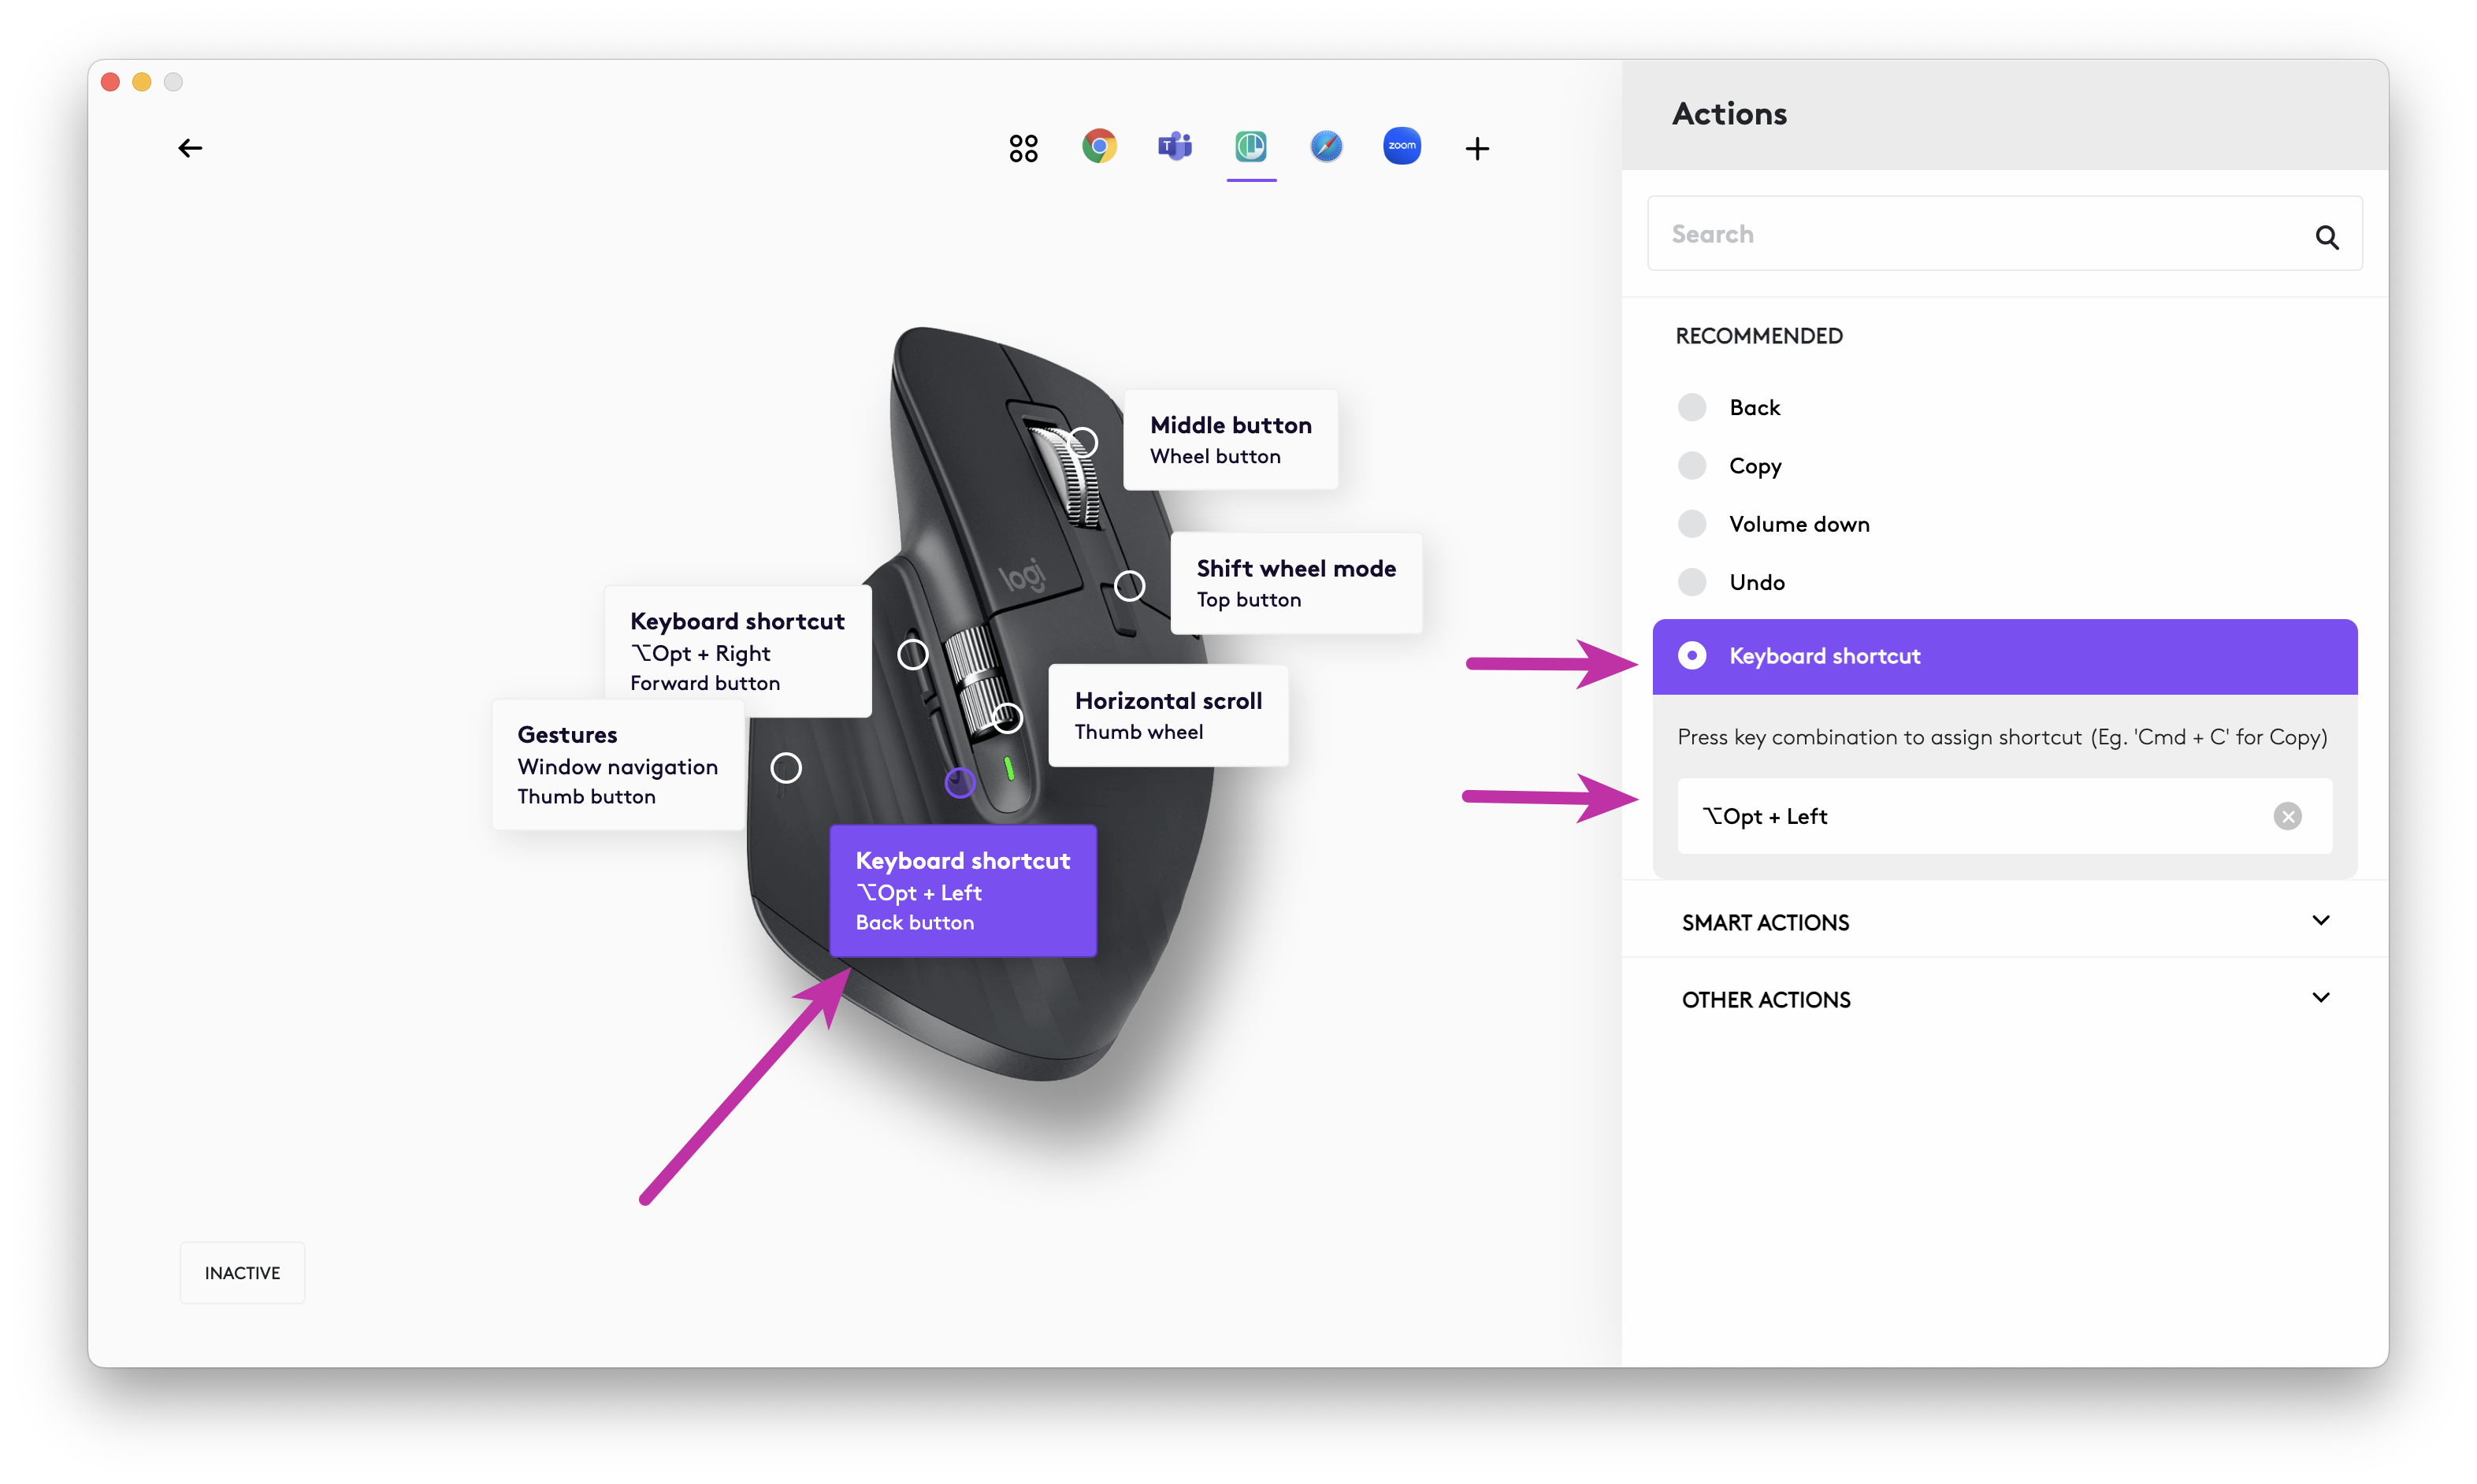
Now you can use the forward and back buttons on your mouse to navigate through the history in Polypane. If you want to change these settings for Polypane, click the Polypane icon in the top icon bar.
Have a question about Polypane?
Contact us any time though chat, Slack or our contact form:
Contact SupportBuild your next project with Polypane
- Use all features on all plans
- On Mac, Window and Linux
- 14-day free trial – no credit card needed

